


Complete Guide: Installing Discord's Dad Bot and Using Every Command
Every command for Discord’s Dad Bot, and how to install it Welcome to our comprehensive guide on installing and using Discord’s Dad Bot! Whether …
Read Article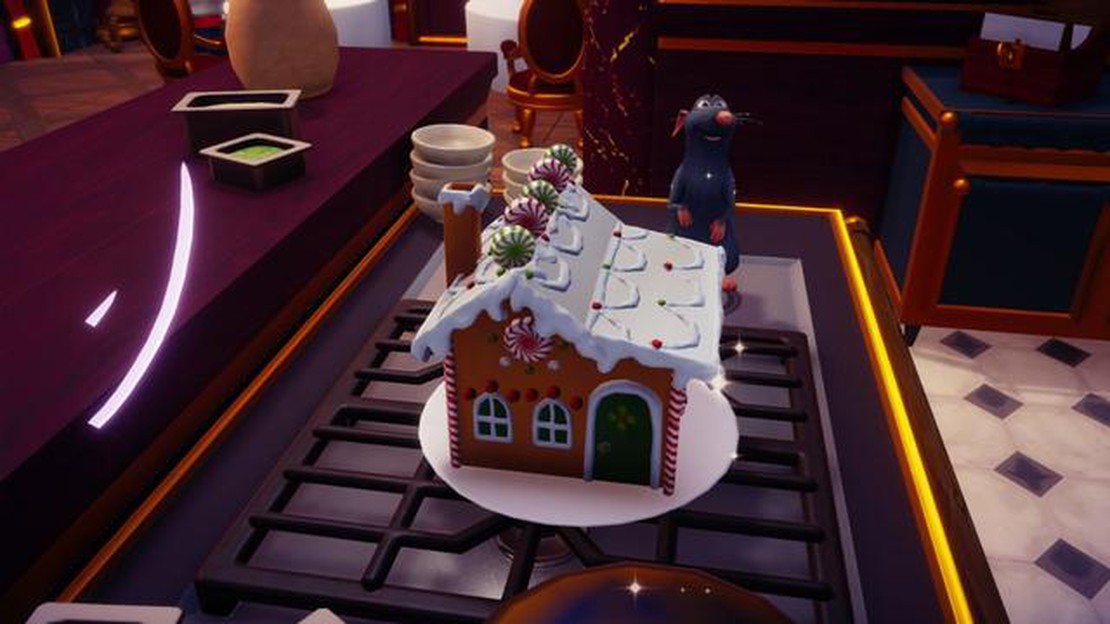
Are you ready to embark on a sweet adventure in the magical world of Disney Dreamlight Valley? In this step-by-step guide, we will show you how to build your very own gingerbread house in this enchanting destination. Get ready to unleash your creativity and indulge in the deliciousness of gingerbread as you bring your dream home to life.
Disney Dreamlight Valley is the ultimate holiday destination, where dreams come true and gingerbread houses come to life. Located in the heart of the valley, the Gingerbread House Workshop is a must-visit attraction for all ages. Whether you’re a seasoned baker or a first-time builder, this guide will take you through the process of building a gingerbread house that would make even the Fairy Godmother proud.
Before you begin, gather all your ingredients and tools. You will need gingerbread cookie dough, royal icing, an assortment of candies and decorations, a piping bag, a pastry brush, and a sturdy base for your gingerbread house. Once you have everything ready, let’s dive into the magical world of Disney Dreamlight Valley and start building your masterpiece.
Building a gingerbread house is a fun and festive activity that can bring the magic of Disney to life in your own home. With this step-by-step guide, you can create your very own gingerbread masterpiece in Disney Dreamlight Valley. Here’s how:
Building a gingerbread house is a wonderful way to celebrate the holiday season and create lasting memories. Follow this step-by-step guide to build your own gingerbread masterpiece in Disney Dreamlight Valley. Happy decorating!
Building a gingerbread house in Disney Dreamlight Valley is a fun and festive activity that requires some preparation. Before you begin, gather the necessary materials and set up your workspace for easy and efficient construction.
By gathering all the necessary materials and setting up a well-organized workspace, you’ll be ready to embark on the gingerbread house construction process in Disney Dreamlight Valley. Enjoy the creative and magical experience!
Read Also: How to Evolve Varoom into Revavroom in Pokémon Scarlet and Violet
Creating a gingerbread house is a fun and creative holiday activity. One of the first steps in building your own gingerbread house is mixing and shaping the gingerbread dough. Follow these steps to ensure your gingerbread dough is the perfect consistency for building:
Expert tip: If you’re making a large gingerbread house, it’s a good idea to bake each piece individually rather than assembling the house and baking it all at once. This will ensure that each piece is thoroughly cooked and will prevent any collapsing or misshaping during the baking process.
Now that your gingerbread dough is mixed and shaped, you’re ready to move on to the next step in building your gingerbread house.
Now that you’ve baked and assembled your gingerbread house, it’s time to bring it to life with some festive decorations! One of the best ways to decorate a gingerbread house is with royal icing and an assortment of colorful candies. Here’s a step-by-step guide on how to decorate your gingerbread house:
Read Also: Complete all Petranaki Panic challenges in Lego Star Wars: The Skywalker Saga with these tips
Remember, decorating a gingerbread house is all about creativity and having fun. Feel free to experiment with different colors, patterns, and candy combinations to make your gingerbread house unique and beautiful. Enjoy the process and show off your masterpiece to friends and family!
To build a gingerbread house, you will need gingerbread dough, icing, various candies and decorations, a gingerbread house template, a baking sheet, and an oven.
You can find gingerbread house templates online, or you can create your own by drawing the design on a piece of paper.
The time it takes to build a gingerbread house varies depending on the complexity of the design and the baking time. It can take anywhere from a few hours to a whole day.
Yes, you can use store-bought gingerbread dough if you prefer. It will save you time and effort, but homemade gingerbread dough often tastes better.
Yes, you can definitely decorate your gingerbread house with edible glitter. It will add a sparkling touch and make your house look more festive.
Every command for Discord’s Dad Bot, and how to install it Welcome to our comprehensive guide on installing and using Discord’s Dad Bot! Whether …
Read Article
What are Twitch Drops, and how to enable them on your Twitch channel Twitch Drops have become a popular feature on the popular streaming platform, …
Read Article
The best moveset for shadow Blaziken in Pokémon Go Shadow Blaziken is one of the most powerful Pokémon in Pokémon Go. With its impressive movepool and …
Read Article
The 10 best Pokémon card packs to buy in 2023 If you’re a fan of the Pokémon Trading Card Game, then you know the thrill of opening a fresh pack and …
Read Article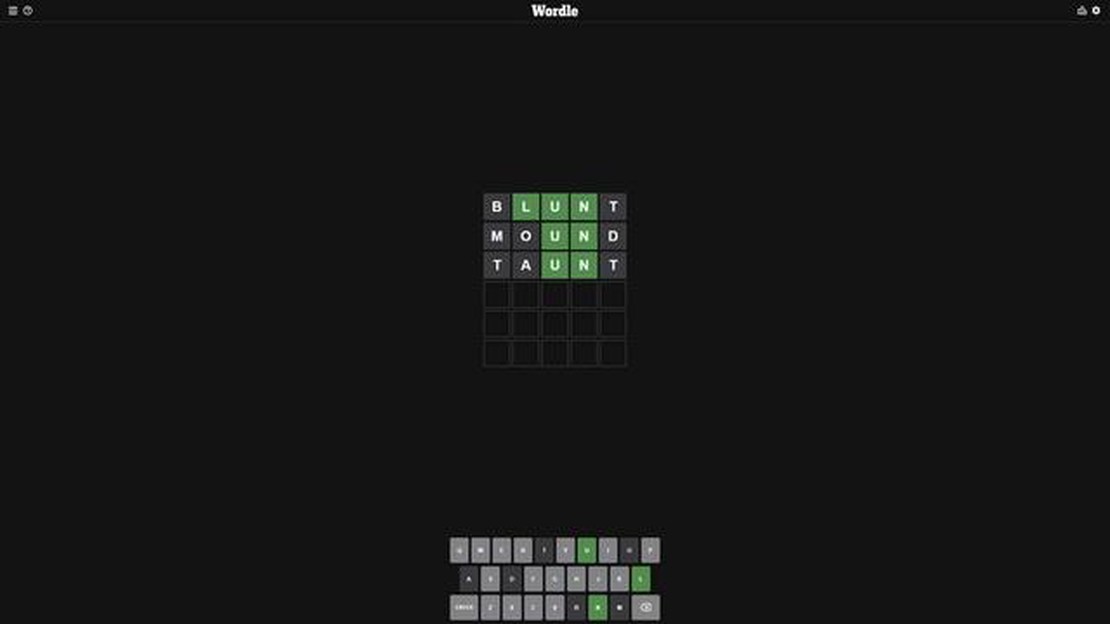
Boost Your Wordle Game Skills with 5-Letter Words Featuring U and N in the Third and Fourth Positions Wordle is a popular online word game that …
Read Article
Disney Dreamlight Valley – How To Make Pan-Seared Bass & Vegetables Welcome to Disney Dreamlight Valley, a world of magic and culinary delights! In …
Read Article


