
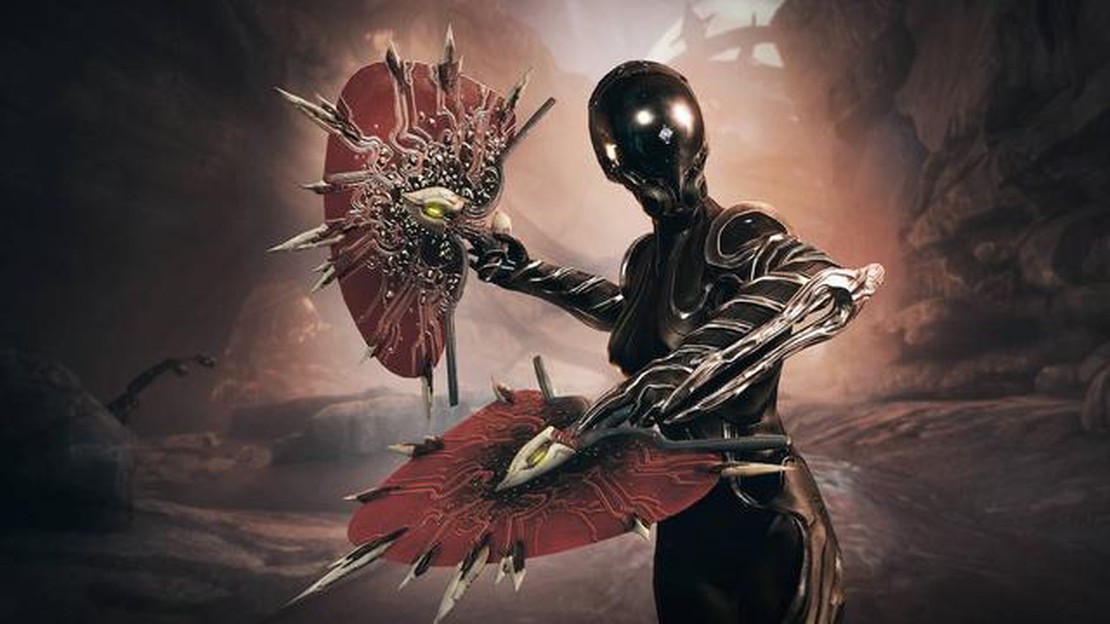

How to Obtain Purple Velocipods in Warframe
How to get Purple Velocipods in Warframe Warframe is a popular online third-person shooter game that offers a vast open world for players to explore. …
Read Article
In Overwatch 2, choosing the perfect name to represent yourself is an important part of creating your unique gaming identity. Whether you want to change your existing name or just want to switch things up, this step-by-step guide will walk you through the process of changing your name in Overwatch 2.
Step 1: Launch Overwatch 2
To begin, launch Overwatch 2 on your preferred gaming platform. Whether you’re playing on PC, PlayStation, or Xbox, the process of changing your name is the same across all platforms.
Step 2: Open the Options Menu
Once the game is loaded, navigate to the main menu and locate the options menu. This can usually be found by selecting the gear icon or by pressing the Options button on your controller.
Step 3: Select the Account Tab
Within the options menu, look for the “Account” tab. This tab contains various settings related to your Overwatch 2 account, including the ability to change your name.
Step 4: Choose the Change Name Option
Under the Account tab, you will find the option to change your name. Select this option to proceed to the next step.
Step 5: Enter Your New Name
A text field will appear where you can enter your new desired name. Keep in mind that there may be character limit or naming restrictions, so choose something that complies with the game’s guidelines.
Step 6: Confirm Your New Name
After entering your new name, the game will ask you to confirm your choice. Double-check the spelling and ensure that you are satisfied with your new name before proceeding.
Step 7: Enjoy Your New Name!
Once you have confirmed your new name, Overwatch 2 will update your profile with the new name. From now on, you’ll be known by your new identity in the Overwatch 2 community.
In conclusion, changing your name in Overwatch 2 is a straightforward process that can be done within the game’s options menu. By following these step-by-step instructions, you can easily switch up your name and continue your gaming journey with a fresh new identity.
Changing your name in Overwatch 2 is a simple process that can be done within the game. Follow the step-by-step guide below to change your name:
It’s worth noting that changing your name in Overwatch 2 will only affect your in-game name and not your username on the platform you’re playing on. Make sure to choose a name that reflects your personality and is memorable to others. Have fun!
To change your name in Overwatch 2, you’ll first need to log in to your Overwatch 2 account. Follow these steps to log in:
Read Also: All Tombs of the Fallen Locations in Assassin's Creed Valhalla
If you have entered the correct credentials, you will be successfully logged in to your Overwatch 2 account. Now you can proceed to the next step to change your name.
Once you have launched Overwatch 2, navigate to the main menu. Look for the option that says “Settings” and click on it. This will bring you to the settings menu where you can customize various aspects of the game.
Read Also: All Boon Totem Perks in Dead by Daylight - The Ultimate Guide
In the settings menu, you will see different tabs such as “Graphics,” “Audio,” and “Controls.” To change your name, you need to access the “Account” tab.
Click on the “Account” tab to open the account settings. Here, you will find options to edit your account information, including your name. Look for the option that says “Change Name” or something similar.
Once you have located the option to change your name, click on it. A new window will appear where you can enter your desired new name.
Keep in mind that there may be some limitations or restrictions on the name change. Make sure to follow any guidelines provided by Blizzard, the developers of Overwatch 2, to ensure that your new name complies with their policies.
After you have entered your new name, click on the “Save” or “Apply” button to confirm the changes. The game will then update your name, and you will see your new name displayed in-game.
Once you have accessed the main menu in Overwatch 2, navigate to the settings option by clicking on the gear icon located at the top right corner of the screen. This will open the settings menu, where you can make various changes to your game preferences.
In the settings menu, you will find a tab labeled “Account.” Click on this tab to access the account settings.
Within the account settings, you will see a section titled “Player Name.” Click on the “Change Name” option located next to your current player name.
A new window will appear, prompting you to enter your desired new player name. Take your time to think of a new name that you would like to use. Keep in mind that the new name must adhere to Overwatch’s naming policies, which prohibit offensive or inappropriate content.
Once you have chosen a new name, type it into the provided text field and click on the “Change” button to confirm the name change.
After confirming the name change, the game will automatically update your player name, and you will be able to see your new name in Overwatch 2.
Remember, changing your player name in Overwatch 2 is a one-time process, so make sure to choose a name that you will be satisfied with in the long run.
Once you have launched Overwatch 2 and are signed into your account, it’s time to change your name. Follow these steps to enter your new name:
Once you have followed these steps, your new name will be saved and displayed in Overwatch 2. Keep in mind that you can only change your name a limited number of times, so choose your new name carefully.
The process for changing your name in Overwatch 2 is fairly simple. First, go to the main menu and select the “Options” tab. From there, choose “Account” and then “Change Name”. Enter your desired new name, making sure it meets the game’s guidelines for acceptable names. Finally, confirm the name change and it will take effect immediately.
Yes, there are restrictions on what name you can choose in Overwatch 2. Your name must not contain any offensive or inappropriate language, and it should not impersonate or reference any real person or entity. Additionally, it must not violate the game’s terms of service or community guidelines. If you attempt to use a name that does not meet these criteria, the game will prompt you to choose a different name.
Yes, you can change your name as many times as you want in Overwatch 2. There are no limits or restrictions on the number of name changes you can make. However, keep in mind that frequent name changes may confuse or frustrate your friends or teammates, so it’s best to choose a name you’re happy with and stick with it for a while.
No, changing your name in Overwatch 2 will not affect your progress or stats. The name change is purely cosmetic and does not have any impact on your gameplay, achievements, or statistics. Your new name will simply be displayed in-game and in the Overwatch 2 community.
How to get Purple Velocipods in Warframe Warframe is a popular online third-person shooter game that offers a vast open world for players to explore. …
Read Article
The top 10 best armor mods for skyrim Modding Skyrim can greatly enhance your gameplay experience, bringing new and exciting elements to the world of …
Read Article
Should you let Lawan detonate the bombs or save Lawan in Dying Light 2 Stay Human? As players navigate the post-apocalyptic world of Dying Light 2 …
Read Article
Warframe: How To Get Charc Electroplax In Warframe, a popular multiplayer online action game, players are constantly on the hunt for valuable …
Read Article
How to Open Void Relics in Warframe Warframe is a popular free-to-play online multiplayer game that offers an exciting sci-fi experience. One of the …
Read Article
Dive into the Kingdom’s Emotions: Discovering All Dondon Locations and Unlocking Rewarding Experiences Welcome, adventurers, to our comprehensive …
Read Article

