


Building a Skeleton King Deck in Clash Royale: Tips and Strategies
How to build a Skeleton King deck in Clash Royale The Skeleton King is a formidable card in Clash Royale that can turn the tide of battle in your …
Read Article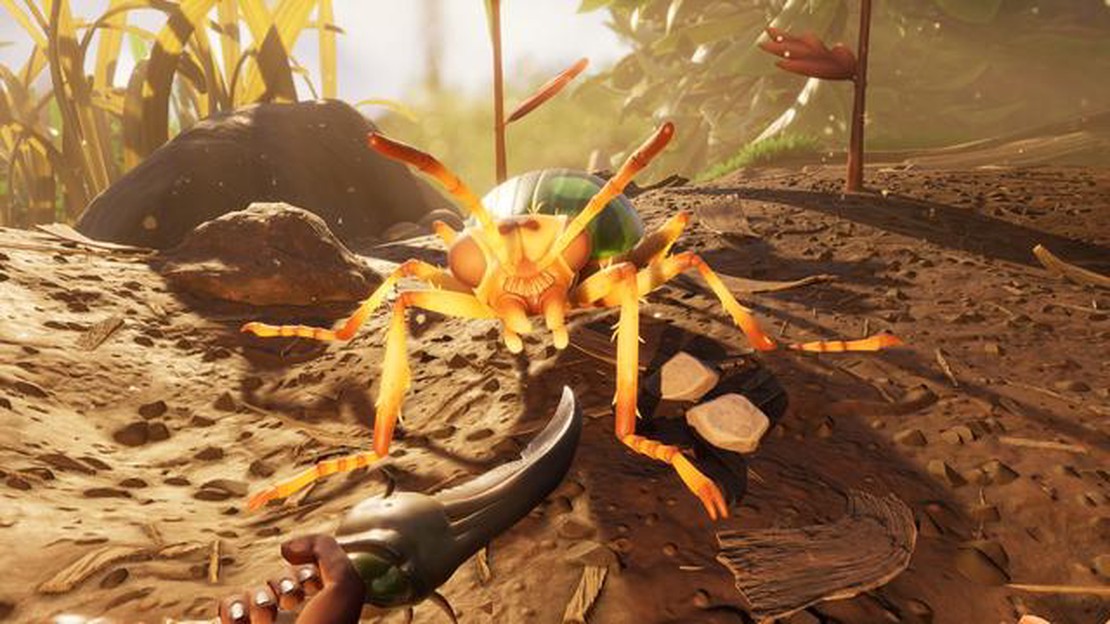
In the survival game Grounded, one of the key mechanics is hunting and cooking food. One delicious and nutritious option for players to create is jerky. Jerky not only provides a hearty meal but also has the added benefit of long-lasting preservation. To create jerky, players must first construct a jerky rack, where the meat can be hung and dried. This step-by-step guide will walk you through the process of creating your very own jerky rack in Grounded.
Step 1: Gather the necessary materials
The first step in creating a jerky rack is to gather the necessary materials. You will need the following:
Pro Tip: Make sure to have enough storage space in your inventory before gathering the materials.
Step 2: Craft the jerky rack
Once you have gathered the required materials, open your inventory menu and navigate to the crafting tab. Locate the “Jerky Rack” recipe, which should now be available. Click on the recipe to craft the jerky rack.
Step 3: Place the jerky rack
After crafting the jerky rack, you will have it in your inventory. To place it in the game world, find a suitable location in your base or campsite. Ensure that there is enough space for the jerky rack and that it is not obstructed by other objects.
Pro Tip: It is recommended to place the jerky rack indoors, away from moisture and potential interference from insects or animals. This will help ensure optimal drying conditions for the meat.
Step 4: Hang the meat
Once you have placed the jerky rack, it is time to hang the meat. Open your inventory and locate the meat that you want to turn into jerky. Move it to your action bar and position yourself close to the jerky rack. Press the corresponding button to interact with the jerky rack and choose the option to hang the meat.
Pro Tip: It is recommended to use meat from large insects, such as aphids or weevils, as they provide a good amount of meat and are common in the game world.
Step 5: Wait for the meat to dry
Once the meat is hanging on the jerky rack, all you need to do is wait for it to dry. This process can take several in-game days, so make sure to check back periodically. When the meat is fully dried, it will turn into jerky, ready to be eaten or stored for later use.
Creating a jerky rack in Grounded is a crucial step in the cooking process, allowing players to preserve and enjoy their hard-earned meat for an extended period of time. Follow this step-by-step guide, and you’ll have your own jerky rack up and running in no time!
Creating a Jerky Rack in Grounded allows you to preserve and dry out meat for longer storage and consumption. Follow these steps to create your own Jerky Rack:
Read Also: Are there Pokémon without type weaknesses? Answered11. * Locate and chop down six Weed Stems using your Pebblet Axe. 12. * Find six Clover plants and harvest their Clover Leaves. 13. Collect the Sweaty Monster Parts: 14. * Defeat Sweat Bugs roaming around or locate existing Sweaty Monster Parts. 15. * Collect two Sweaty Monster Parts. 16. Obtain the Spider Silk: 17. * Use a Loom or defeat Spiders to collect two Spider Silk. 18. Build the Jerky Rack:
19. * Open your inventory and go to the “Structures” tab. 20. * Select the Jerky Rack blueprint and click on the ground where you want to place it. 21. * Follow the prompt to build the Jerky Rack using the collected materials. 22. Enjoy your Jerky Rack: 23. * Once the Jerky Rack is built, you can now hang raw meat on it to dry and preserve it. 24. * Wait for the meat to turn into jerky, which can be eaten or stored for even longer durations.
Now that you have your Jerky Rack, you can ensure a steady supply of preserved meat to keep yourself healthy and ready for any challenges that come your way in the world of Grounded!
A jerky rack is a structure in the game Grounded that allows players to preserve and dry their meat, creating jerky. Jerky is a valuable food source as it provides a longer-lasting and more nutritious option compared to regular raw meat. It also does not spoil, making it an essential resource in survival gameplay.
Read Also: How to Change Villager Jobs in Minecraft - Step-by-Step Guide
To create a jerky rack, players need to gather resources such as weed stems and woven fibers. These materials can be obtained by exploring the game world and cutting down plants. Once the necessary resources are gathered, players can craft and place the jerky rack in a suitable location.
The jerky rack has several hooks where players can hang raw meat to dry. As time passes, the meat will gradually turn into jerky, becoming a long-lasting food source. Jerky provides more hunger and thirst satisfaction when consumed, making it a valuable resource for extended exploration trips or when food is scarce.
In addition to its practical benefits, the jerky rack also adds a realistic touch to the game. Drying meat is a common method of food preservation in real life, and having this mechanic in Grounded adds to the immersive survival experience.
Overall, a jerky rack is an essential tool in Grounded for any player looking to efficiently preserve and manage their meat resources. Its ability to turn raw meat into jerky provides longer-lasting nutrition, making it a valuable asset in the challenging world of Grounded.
To build a jerky rack in Grounded, you will need the following resources:
Once you have gathered these resources, follow the steps below to build a jerky rack:
After building the jerky rack, you can use it to dry and preserve meat in the game. Simply place raw meat on the jerky rack, and over time it will turn into jerky, which can be eaten to restore hunger and health.
Make sure to keep an eye on the jerky rack and collect the jerky before it spoils. If you leave it on the rack for too long, it will become rotten and cannot be consumed.
That’s it! You have successfully built a jerky rack in Grounded and can now start drying and preserving meat.
Once you have successfully built your jerky rack in Grounded, there are a few tips and tricks you can follow to make the most out of it:
By following these tips and tricks, you can create delicious and flavorful jerky using your jerky rack in Grounded. Enjoy!
To create a jerky rack in Grounded, you will need the following materials: 6 Sprigs, 6 Plant Fibers, and 2 Spider Silk.
A jerky rack is used to dry out raw meat in Grounded. Once placed, you can hang raw meat on the jerky rack, and over time it will turn into dry jerky. Dry jerky is a valuable food source as it does not spoil, and it can greatly increase your hunger and thirst meters when consumed.
Yes, you can build multiple jerky racks in Grounded. As long as you have the necessary materials, you can craft and place as many jerky racks as you want in your base or wherever you’d like. This can be helpful if you have a large amount of raw meat that you want to dry out.
The amount of time it takes for raw meat to turn into dry jerky on a jerky rack in Grounded depends on the type of meat. Small raw meat, such as aphid meat, typically takes around 15 minutes to dry out. Larger raw meat, such as weevil meat, can take around 30 minutes to dry out. It’s important to note that time may vary based on the in-game conditions and any buffs or debuffs that may affect the drying process.
Aside from drying raw meat, a jerky rack in Grounded does not have any other specific uses. However, having a good supply of dried jerky can be extremely beneficial for surviving in the game, as it provides a long-lasting and high-quality food source that does not spoil. Additionally, dried jerky can be used as bait for traps to catch insects or as a trade item with other players in multiplayer sessions.
No, the jerky rack cannot be destroyed by insects or other creatures in Grounded. Once placed, the jerky rack is a permanent structure that will remain in the game world until you decide to remove it. This allows you to safely dry out your raw meat without the risk of it being stolen or destroyed by insects or other creatures.
How to build a Skeleton King deck in Clash Royale The Skeleton King is a formidable card in Clash Royale that can turn the tide of battle in your …
Read Article
Solving the Connection Failed Puget-Altus Error in Call of Duty: Modern Warfare 2: A Complete Guide If you are experiencing the Connection Failed …
Read Article
How to get the Terraformer in Terraria Welcome to our step-by-step guide on how to obtain the Terraformer in Terraria! The Terraformer is a powerful …
Read Article
How to deploy a Specter in Warframe Warframe is a popular free-to-play online action role-playing game that immerses players in a futuristic world …
Read Article
The 5 best heroes in Bloons TD 6 Looking to dominate the bloons in Bloons TD 6? Well, you’re going to need some powerful heroes by your side. In this …
Read Article
How to get lithium in Subnautica Subnautica is an underwater survival game that takes place on an alien planet filled with mysterious creatures and …
Read Article


